Wooden Frame Cold Plunge: Build Your Own Luxury Tub
Build a custom cedar-framed cold plunge with a waterproof liner, integrated chilling, and a premium look that suits permanent backyard setups.
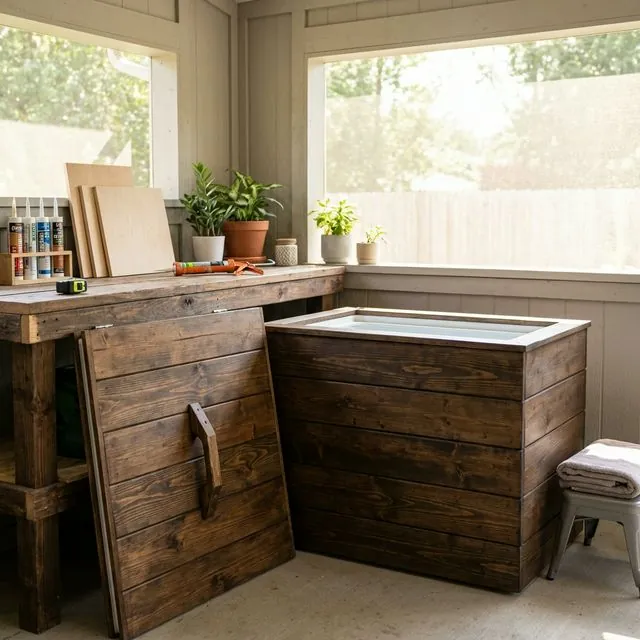
This is the ultimate DIY project for those who want a "spa-like" aesthetic without the $5,000 price tag. Using cedar or treated lumber, you can create a beautiful exterior that hides all plumbing and equipment — a permanent backyard fixture that looks like it was installed by a spa company rather than assembled from a liner and lumber.
It is also, honestly, the most demanding build we cover. A wooden frame plunge takes two to three weekends, real carpentry, and a plan for water, power, and drainage before the first board is cut. Looking for an easier build? Check our DIY cold plunge overview to compare all 6 methods before committing to a wooden frame — a stock tank build delivers 80% of the function in about 2 hours.
Who Should Build a Wooden Frame Plunge?
Build wooden if all three are true:
- You want it permanent. This is not a tub you drain and move for the winter. Pick the site once.
- You care how it looks. The whole point of the frame is hiding the liner, plumbing, and chiller behind cedar. If aesthetics don't matter, cheaper builds cool water just as well.
- You are comfortable with intermediate carpentry. Square framing, basic plumbing penetrations through a liner, and outdoor electrical planning are all involved.
If the honest answer is "two out of three," a stock tank wrapped in a simple cedar surround gets you most of the look for a fraction of the labor.
Planning the Size and Site
Size the interior around immersion depth, not lounging room. A soaking box of roughly 30" x 60" with 28-30" of water depth submerges an adult to the shoulders when seated with knees bent, using around 100-120 gallons. Bigger sounds luxurious, but every extra gallon is more water to chill, more sanitizer to manage, and a longer pull-down after water changes.
For the site itself:
- Foundation: Water weighs about 8.3 lbs per gallon, so a filled build lands in the 1,200-1,500 lb range with occupant. That needs a level concrete pad, pavers on compacted gravel, or a properly built deck section rated for the point load — not bare lawn.
- Power: The chiller needs a GFCI-protected outdoor circuit. Plan the cord path before framing, not after.
- Drainage: You will eventually dump 100+ gallons. Slope, a drain hose route, or a nearby cleanout makes water changes painless; a bad plan makes them a monthly chore.
- Shade: Afternoon shade meaningfully reduces chiller workload in summer. If you have a choice of corners, pick the shaded one.
Materials List
- Frame: 2x4 cedar or pressure-treated lumber for the structural box; 4x4 posts for corners on larger builds.
- Sheathing: 3/4" exterior-grade plywood lining the inside of the frame to give the liner smooth, continuous support.
- Vessel: Food-grade waterproof pond liner (45 mil EPDM is the common choice) or a custom-cut plastic tub insert.
- Insulation: 2" rigid foam boards on all four walls and the floor (see our insulation guide for material options and what they do to running costs).
- Cooling: 1/2 HP industrial chiller or a purpose-built cold plunge unit (see our chiller reviews for recommendations), plus two bulkhead fittings for the circulation loop.
- Finishing: Cedar tongue-and-groove siding, exterior screws, and marine-grade sealer.
- Hardware: Bulkhead fittings, PVC or flexible tubing for the chiller loop, and a bottom drain fitting if you want gravity draining.
Budget-wise, expect the lumber, liner, foam, and hardware to run a few hundred dollars; the chiller is the dominant cost of the project, typically more than everything else combined. Run your total against a commercial tub in the cost calculator before you commit — the DIY math is compelling, but only if you were buying a chiller anyway.
Construction Steps
- Frame build: Create a rectangular frame sized to your desired immersion depth. Frame it like a short section of stud wall on all four sides — plates top and bottom, studs on 16" centers — screwed into a solid base. Check square by measuring diagonals before anything is fastened permanently; an out-of-square box telegraphs into every later step.
- Sheathe the interior: Line the inside faces with exterior plywood. The liner needs continuous support — any gap or screw head becomes a stress point that eventually leaks.
- Internal insulation: Line the internal walls and floor with rigid foam board before installing the liner. Cold plunges lose most of their heat through uninsulated walls, and this single step is the difference between a chiller that idles and one that runs all afternoon.
- Install the liner: Drape the EPDM liner with generous overlap, fold corners like wrapping paper rather than cutting them, and clamp the top edge before trimming. Fill with a few inches of water to seat it before final fastening.
- Plumbing penetrations: Install two bulkhead fittings for the chiller loop (and a bottom drain if using one). Cut the liner holes undersized, use both gaskets, and hand-tighten plus a quarter turn — over-torqued bulkheads distort and leak.
- Equipment housing: Build a "bump out" or adjacent box to house the chiller and pump, protecting them from the elements. Leave ventilation gaps — chillers reject heat and need airflow, so a sealed cabinet will cook the compressor.
- Finishing: Use cedar tongue-and-groove siding for a professional, high-end look. A hinged cedar lid frame with rigid foam glued to its underside keeps debris out and cold in.
- Leak test: Fill completely and wait 24 hours before connecting the chiller. Check every fitting, then check again after the first temperature pull-down — cold contracts fittings and reveals lazy connections.
First Fill and Pull-Down
Fill from the hose, balance your sanitizer, and let the chiller work overnight for the first pull-down — 100+ gallons from tap temperature to the low 40s is an overnight job for a mid-size unit, not an afternoon one. From there, a well-insulated wooden build holds temperature efficiently, and the chiller mostly idles between sessions. If you are new to cold exposure, start at the warm end of the range in our temperature guide and follow the session-length progression in how long to cold plunge.
Maintenance
Treat the wood annually with a marine-grade sealer to prevent rot and UV damage — spring is the natural time, after winter has done its worst. Keep an eye on the liner's top edge where sun exposure is highest, and re-tuck any section that pulls free.
For the water itself, a wooden build follows the same routine as any plunge: rinse before you get in, keep the lid on, and follow our water care and maintenance guide for sanitizer and testing cadence. With 100+ gallons and a filtered chiller loop, expect full water changes on the schedule in how often to change cold plunge water.
If your winters freeze, decide up front whether you will run the chiller year-round or shut down for the season — a hard freeze with water in the lines destroys pumps and fittings. Our winterizing guide covers both paths.
Common Mistakes to Avoid
- Skipping insulation to save a weekend. The build still works, but your chiller runs constantly and summer performance suffers. Insulation is the highest-value component in the whole materials list.
- Cutting liner corners instead of folding. Every cut is a future leak. Fold and tuck.
- Sealing the chiller into an airtight cabinet. It needs airflow to reject heat.
- No drainage plan. Draining 100 gallons through a bucket relay gets old exactly once.
- Building bigger than you'll use. A snug soak box chills faster, costs less to run, and gets used more.
Related Guides
- DIY Cold Plunge Overview: All Build Methods -- Compare all 6 DIY approaches
- Stock Tank Cold Plunge -- Easier build with similar durability
- DIY Chest Freezer Cold Plunge -- Budget option with built-in cooling
- Cold Plunge Water Care -- Keep your water clean and safe
- Getting Started with Cold Plunge -- Temperature protocols for beginners
- Cold Plunge Insulation Guide -- Maximize energy efficiency
Sources
Wooden Build Materials
Marine-Grade Pond Liner (12x15 ft)
Heavy-duty EPDM liner for waterproofing custom wooden tubs.
Stainless Steel Deck Screws (1 lb)
Corrosion-resistant fasteners rated for outdoor water applications.
You Might Also Like
Advanced Temperature Control for DIY Cold Plunges
Upgrade your DIY cold plunge with digital thermostats, smart controls, cooling schedules, and operating-cost controls that improve consistency.
Stock Tank Cold Plunge: 2-Hour Build Under $400 (2026)
Build a durable cold plunge with a galvanized stock tank, external chiller, and basic plumbing in one of the easiest DIY setups for beginners.
Inflatable Cold Plunge Setup Guide for Beginners
Build an inflatable cold plunge setup for a garage, patio, or spare room. Compare tub types, cooling options, maintenance, and upgrade paths before you buy.
Best Cold Plunge Tubs for 2026
Our top-rated cold plunge tubs after hands-on testing.