Cold Plunge Insulation Guide: Save 40% on Energy
How to properly insulate any cold plunge vessel. We test rigid foam, spray foam, and reflective wraps for maximum thermal efficiency.
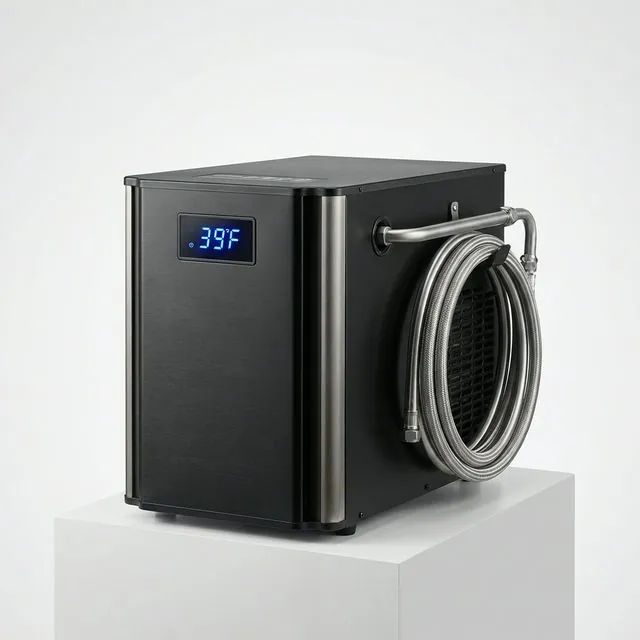
Without insulation, your chiller is fighting a losing battle against ambient air temperature. Proper insulation can reduce your electricity bill by 40% or more, whether you are building a stock tank cold plunge, an inflatable cold plunge, a wooden cold plunge build, or a hot tub conversion.
The physics is simple: every degree of difference between your water and the outside air drives heat into the tub, and in summer that difference can be 40°F or more. Either your chiller pays for that heat gain in runtime and electricity, or your ice budget pays for it in melt. Insulation is the only part of a cold plunge setup that pays you back every single day it exists.
How Much Insulation Actually Matters?
Commercial tubs demonstrate the ceiling. In our Ice Barrel 500 testing, the double-wall insulated shell held 50°F water within 3°F over 24 hours in 85°F ambient heat with the lid on. An uninsulated stock tank in the same conditions drifts toward air temperature in hours, not days. That gap is the whole argument: with good insulation, ice becomes a top-up rather than a full refill, and a chiller idles at setpoint instead of cycling all afternoon.
For DIY builders, the practical target is 2 inches of insulation on the walls, at least 1 inch under the base, and a genuinely insulated lid. That combination gets a homemade build surprisingly close to commercial thermal performance for well under a hundred dollars in materials.
Best Materials
- Rigid Foam Board (EPS/XPS): Best for square builds or framing. High R-value (roughly R-5 per inch for XPS) and easy to integrate with tighter temperature control systems. Cut it with a utility knife, dry-fit the panels, and foam-tape the seams — gaps between boards are where performance quietly leaks away.
- Reflective Bubble Wrap: Best for round tubs and stock tanks. The R-value per layer is modest, but it conforms to curves, installs in minutes with foil tape, and is easy to remove before winterizing. Two overlapping wraps noticeably outperform one.
- Closed-Cell Spray Foam: The gold standard for permanent installations like a concrete block cold plunge — highest R-value per inch, air-seals every gap, and adds structural rigidity. It is also the hardest to reverse and the messiest to apply, so plan carefully and mask everything you don't want foamed.
Don't Skip the Base
Insulating the walls while leaving the tub sitting on bare concrete undoes a chunk of the work — a slab is an enormous heat reservoir in direct contact with your coldest surface. A sheet of 1" rigid foam under the vessel (or under the frame, for built plunges) breaks that thermal bridge for a few dollars. On soft ground, pavers over foam board give you a level, insulated footing in one step.
The Most Important Part: The Lid
Heat gain primarily happens through the surface of the water. Using a 2-inch thick insulated cover is more important than insulating the side walls, and it reduces runtime stress that later shows up in your chiller maintenance. It also keeps your temperature control system from chasing big swings after every session.
An open water surface loses cold three ways at once — evaporation, convection, and radiation — and evaporation alone can dominate the whole tub's heat budget on a dry, breezy day. Any rigid, gasketed cover beats a floating sheet, but the cheap DIY version works too: a plywood lid with 2" of rigid foam glued underneath, cut to sit just above the waterline. As a bonus, a covered tub collects no leaves and loses sanitizer more slowly, which shows up as fewer surprises in your water care routine.
Insulating by Build Type
- Stock tanks: Reflective wrap around the walls, foam board underneath, insulated lid on top. The galvanized steel is a heat conductor, so this transformation is dramatic — details in the stock tank guide.
- Inflatable tubs: The air chambers already insulate reasonably well. Focus on the base and a proper lid; see the inflatable guide for what these tubs can and can't do.
- Wooden frame builds: Foam board goes between the frame and liner during construction — it is nearly impossible to retrofit, which is why the build guide sequences it before the liner goes in.
- Hot tub conversions: Already insulated for keeping heat in, which works identically for keeping heat out. Your effort goes to the cover instead — the original spa cover is usually fine. See the conversion guide.
Pro Tip
If building a DIY chest freezer plunge, the walls are already insulated, but adding 1" of rigid foam to the base will prevent heat transfer from the floor. Outdoor owners should pair that with a seasonal winterizing plan and the electrical basics in our cold plunge safety protocols.
What It Does to Your Bill
The payoff shows up two ways. On ice, an insulated tub cuts consumption enough that many owners go from re-icing every session to topping up every few days. On a chiller, insulation converts run-hours into idle-hours — the unit pulls down once, then sips power holding setpoint. Our electricity cost breakdown walks through the numbers, and the cost calculator lets you compare an insulated and uninsulated setup side by side. For a 2-3 hour project, nothing else in cold plunging returns as much per dollar.
Sources
Insulation Materials
Reflectix Foil Insulation Roll
Reflective bubble insulation for reducing heat gain and improving efficiency.
Owens Corning Foam Board Insulation
High-R-value rigid foam board for maximum thermal protection.
You Might Also Like
Wooden Frame Cold Plunge: Build Your Own Luxury Tub
Build a custom cedar-framed cold plunge with a waterproof liner, integrated chilling, and a premium look that suits permanent backyard setups.
Advanced Temperature Control for DIY Cold Plunges
Upgrade your DIY cold plunge with digital thermostats, smart controls, cooling schedules, and operating-cost controls that improve consistency.
Stock Tank Cold Plunge: 2-Hour Build Under $400 (2026)
Build a durable cold plunge with a galvanized stock tank, external chiller, and basic plumbing in one of the easiest DIY setups for beginners.
Best Cold Plunge Tubs for 2026
Our top-rated cold plunge tubs after hands-on testing.